Lifestyle scene
Place your product in a setting you describe. In this tutorial, you turn a source photo into a lifestyle image, compare the result and try three different scene briefs.
The Addon uses your photo as a reference and generates a new image. It can add a setting, props and people you ask for. It tries to preserve the product, but you still need to check its appearance before using the image.
Before you start
- Log in and prepare a clear product photo, or select one already in your media library.
- Choose a photo showing the important details: the front label, the full outline and the surfaces you want visible in the result.
- Decide where the image will be used. A portrait composition suits a different placement from a wide banner.
- Check the price shown before you generate. Credits explains preview billing.
Create a scene
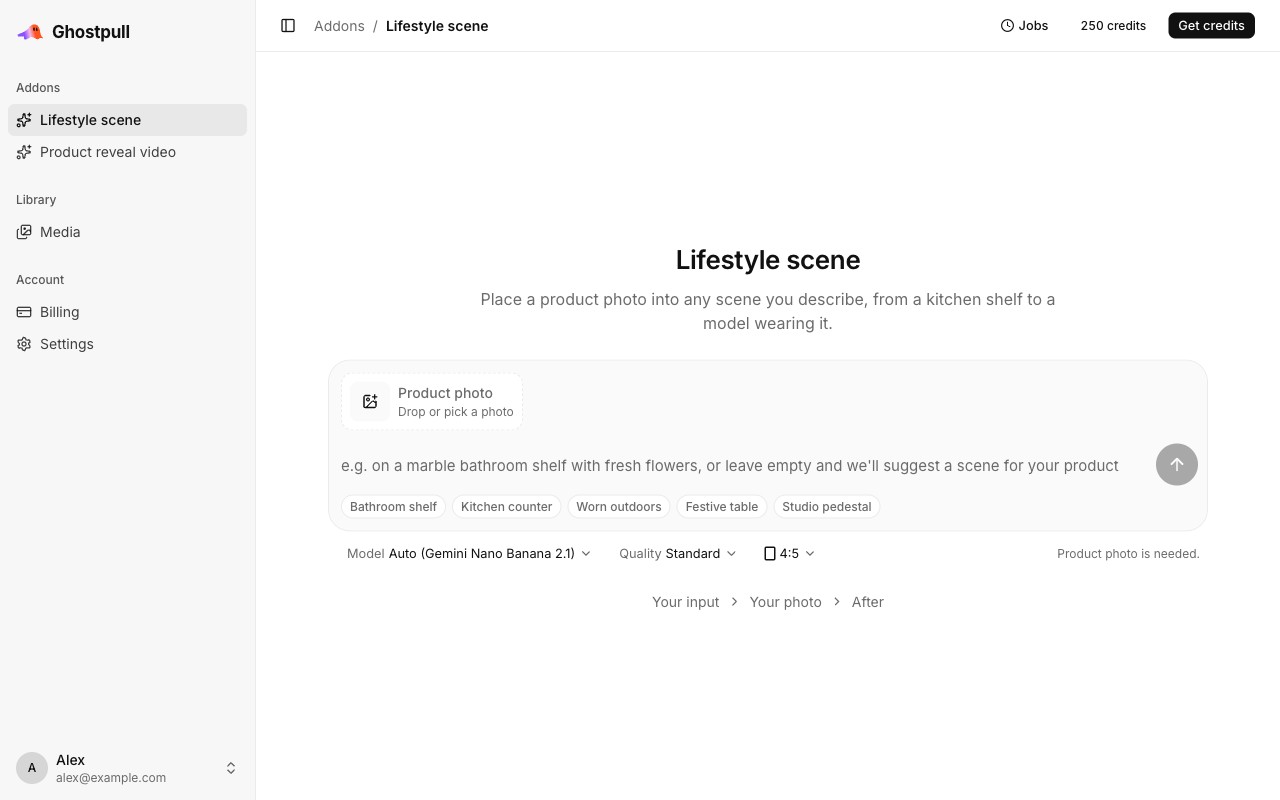
- Open Lifestyle scene from Addons.
- Select Product photo and choose a file or library image. You can also drop a photo onto the composer. Check its thumbnail before continuing.
- Enter a setting in Scene, for example the skincare brief below. A suggestion chip inserts text you can edit. To let Ghostpull choose a setting from the product, leave the field empty.
- Optionally choose a Brand. Its colors and mood shape the setting, the light and the props, and in an automatically chosen setting too. The Addon asks for no logo, brand name or text and tries to keep your product as it is, so check both in the result. The selector starts on your default brand; choose No brand to make the image without one. See Brands.
- Choose Model, Quality and Image shape. For a first attempt, keep the model on Auto and the quality on Standard. Choose a shape that suits your placement.
- Select Generate. The run creates the image and checks its fidelity. You may see Improving your photo while it makes another attempt.
- Once the run succeeds, compare the source and After at full size. Read Scene to see the text used, including an automatically chosen setting, and read Check if a warning appears.
- Inspect the product, then select Download. The successful image is also in Library. Keep the run's URL if you want its scene text later.
Example: skincare on a bathroom shelf
Goal: show a skincare bottle in a calm bathroom setting while keeping the front label visible.
Select a sharp photo of the bottle and put this in Scene:
On a pale stone bathroom shelf beside a folded cream towel, soft daylight
from the left, a small blurred plant in the background. The bottle stands
upright at its normal size, front label facing the camera, with clear space
around it.
Choose a portrait Image shape, then generate the image. Compare the label, cap, bottle silhouette and colour against the source. If the props compete with the product, replace the setting with:
On an empty pale stone bathroom shelf in soft daylight, front label facing
the camera, no props beside the bottle, softly blurred wall behind it.
Generate another run and compare the results. Change one part of the brief at a time so you can see whether simpler surroundings help.
Example: kitchenware for a wide banner
Goal: put a ceramic bowl on a kitchen counter with room around it.
Use a source showing the complete bowl. Enter:
On a warm wooden kitchen counter near a window in morning light. The bowl
sits on the left side of the composition at its natural size, with an open,
uncluttered counter extending to the right. A softly blurred kitchen behind
it, no food inside the bowl.
Choose a wide Image shape and generate. Check the rim, glaze and bowl depth, then check whether the right side has enough space for your layout. If the composition is too busy, remove background detail from the brief and try again. The request for empty space guides the image model; it does not fix the product to an exact pixel position.
Example: a jacket worn outdoors
Goal: show how a jacket looks in use while preserving its construction.
Choose a photo that clearly shows the jacket's shape and fastening. Enter:
Worn by an adult model standing on a quiet city street in soft overcast
daylight, framed from head to upper thighs. The jacket is fully visible,
arms relaxed at the sides, no bag or scarf covering it, neutral buildings
blurred in the background.
Generate a portrait image. Compare the zip or buttons, pockets, sleeves, fabric texture and colour. If an arm covers a pocket, refine the pose in Scene and generate again. If the jacket changes shape or gains details, try a cleaner source photo or another model.
The image is an AI generated illustration of the product in use. It does not verify garment fit, measurements or drape for a particular person.
Refine the result
| Issue | Useful change |
|---|---|
| Scene distracts from the product | Use fewer props, simpler surfaces and a quieter background. |
| Product looks too large | Name a familiar surface or setting and ask for its natural size. |
| Label or small detail changed | Try a sharper source or a different Model, then compare again. |
| No specific scene in mind | Leave Scene empty; read the chosen scene in the result. |
| Colors or mood do not fit your shop | Choose another Brand, or edit the brand's Look and colors. |
| Check names a problem | Inspect that feature at full size. Try a clearer source or a revised scene. |
Auto currently chooses the Gemini image model and can fall back to GPT Image when the provider rate limits it. Choosing a model explicitly keeps that choice. High requests higher quality from the provider; it does not guarantee exact product fidelity or a fixed pixel size.
The model may also approximate your chosen shape: GPT Image currently uses 3:4 when you request 4:5. Check the downloaded image before placing it in a layout that needs an exact ratio.
Next
- Catalog photo: prepare an image on white.
- Product reveal video: move between two scenes.